Would you like to make this site your homepage? It's fast and easy...
Yes, Please make this my home page!
PB640 Flash BIOS Update
Bios Upgrade Procedure
| 1. |
Insert the BIOS update diskette into drive A: and reboot the system. |
| 2. |
The following dialog box will appear: |

| 4. |
The Main Menu will appear on the screen: |

| 5. |
Select "Update Flash Memory Area from a file" using the Down Arrow Key. |
| 7. |
The UPDATE FLASH AREA dialog box appears on the screen: |
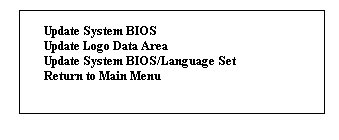
| 8. |
Select "Update System Bios". |
| 10. |
The following dialog box will appear: |
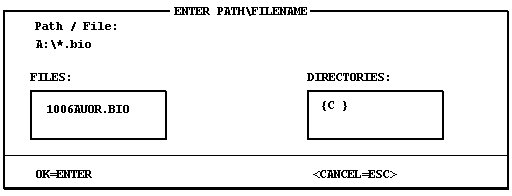
| 11. |
Select 1006AU0R.BIO file. |
| 13. |
Press <Enter> at the following screen to proceed with programming. |
| 14. |
The following dialog box will appear on the screen: |

| 15. |
The following message will appear: |

| 16. |
The BIOS is now re-programmed with the updated BIOS file. |
| 17. |
Remove the disk from drive A. |
| 18. |
Press <Enter> to reboot the computer system. |
| 19. |
Complete the process by running the CMOS Setup program. |
Bios Recovery
| 1. |
The 'FLASH NORMAL/FLASH RECOVERY' jumper block,J9C1 is located near the Primary Power Connector,J9E2. |
| 2. |
Move the 'FLASH NORMAL/FLASH RECOVERY' jumper block,J9C1 from pins 1-2 to pins 2-3. |
| 3. |
Insert the BIOS upgrade diskette and reboot the system. No video is available during the procedure. |
| 4. |
The system beeps once and starts copying the recovery code into the CMOS Flash memory. |
| 5. |
The system beeps twice as the recovery completes. |
| 6. |
Turn off the system and move the jumper block,J9C1 from pins 2-3 to pins 1-2. |
| 7. |
Leave the BIOS upgrade diskette in the floppy drive, and continue with the original upgrade following the procedure described in 'BIOS UPGRADE PROCEDURE'. |